Epson DX7400 Review - Multifunction on a budget

There is a massive choice of multifunction (MF) printers on the market. Some try to do all things great (and fail) and charge a high price tag, others try to do too much and end up just a big disappointment. Epson have been making MF printers for a long time now, and their Stylus DX7400 offers a really good specification on paper, without a high price tag. A little shopping around can bag you the DX7400 for just £48, which gets you an inkjet printer, a scanner, a copier, and the ability to print direct from Pictbridge digital cameras. The only thing it lacks that more (much more) expensive offerings have is a fax machine, but in the age of the email, who uses a fax machine nowadays anyway?!

The DX7400 uses a four colour print system, with separate ink cartridges for cyan, magenta, yellow and black. This is great, as you only need to replace one empty cartridge at a time, with no wasted ink. This is only going to cost you around £6 per cartridge, so it is very cheap to keep this printer running. Many photo dedicated printers use six or more ink colours, to give you better tonal range, but to my surprise the photos from the DX7400 printed out very quickly and were great quality. When printing on normal inkjet paper (rather than glossy), large areas of flat colour did show some banding, but with careful use this could be avoided. For general full colour prints, like office documents, diagrams etc, not only were all the colours bright and vivid, with nice crisp text, but pages shot out at a great speed. Epson quote up to 32 pages per minute (ppm), in my experience I was getting an average of around 22ppm.

The fact that you also have a scanner bed on the DX7400 is a real boon. It might not sound much, but you will be surprised at how much you use the 'Copy' facility. Just pop your original on the glass, and push either the black copy of colour copy button. I tried some pages of text, which gave me nice crisp copies, with a white background, at around 22ppm. A full colour magazine page was slightly slower and did put quite a lot of ink of the page, things ended up a bit soggy. I changed over to some higher quality matte inkjet paper (100gsm) and then tried the magazine copy again. This time around things were hunky dory. A really nice copy, with good accurate colour reproduction.

Scanning is very simple. You can use Epson's own Scan Assistant software, which offers three different levels of scanning, from an auto-mode, through to a home mode, or a professional mode where you can control more or less every aspect of the scan. The DX7400 is also fully twain compliant, so you can scan from within your fave application (eg. PhotoShop). The scans were great, very fast to preview, and a pretty resectable speed for the final scan. Text was great, photos were very accurate, the only caveat was black and white photos which had a slight green tinge. This was easily corrected, so not really worth worrying about.

To say I was impressed with the Epson Stylus DX7400 is an understatement. The software included is easy to install, it even includes a version ABBYY FineReader for optical character recognition. The rest of the Epson suite of software really allows you to use all of the features easily and effectively. The printout quality is really good, for this price bracket it is hard to fault. Add to this the invaluable copy feature, then on top of that a really good scanner and you are onto a winner. If I had been told that the DX7400 was £99, I would still have to recommend it, but for half this price, it is a real bargain.

Product: Epson Stylus DX7400
Price: £44 (Amazon)
Supplied by: Epson UK
Contact: +44 (0)8702 416900

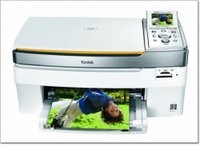
Kodak EasyShare 5300 Review

When it comes to choosing a new inkjet printer, you really are spoilt for choice. Add in the need for an all-in-one offering, for scanning as well, and things can become a little more complicated. Kodak plan to change this by introducing the EasyShare 5300 to the market. This is a really smart looking inkjet, in a nice white and silver finish that would not look out of place next to an iMac (though it will of course work with any Mac or PC). It offers the ability to scan, print from a selection of memory cards, and of course is a normal inkjet printer. It sports a 3-inch colour LCD screen, borderless printing, and claims of upto 32ppm in black and white, or 30ppm in full colour, which is pretty impressive.

Paper and inks are where the 5300 really excels. On the paper front you have two trays, one can be kept loaded with upto 100 A4 sheets, for regular documents and/or larger photo prints. The smaller tray sits just above this and is dedicated to 6x4 photo paper (capacity 20 sheets). You keep this loaded at all times and engage it by pushing it into the printer body a couple of inches. When engaged a green LED comes on to indicate that you are going to print from the 6x4 tray. This is a nice way of doing things, although I would prefer to select this in the printer driver on-screen rather than having to remember to engage the tray, but I guess this could just be a personal preference.
Inks and economy are taken to a whole new level. Up until now we have all been told to avoid printers that use all in one cartridges, and for good reason. Supposedly, if an ink cartridge consists of cyan, magenta, yellow and black, when just the black or cyan runs out, you have to replace the whole thing, even if the yellow is still full. With many other printers, this can be very costly. I have seen CMYK ink cartridges cost as much as £30 before, so why is the EasyShare 5300 different?
Well, the 5300 has two ink cartridges, one for the black ink and the other holds the cyan, magenta,yellow, light cyan and light magenta. In a typical scenario the black would always run out first, so it is nice that this is separate. But what about that colour cartridge? Kodak have taken a different angle on this all-in-one cartridge business. Firstly, they say that the 5300 uses less ink than its competitors (see chart). You should expect to get around twice as much printing out of a cartridge when dealing with colour and almost three times as much for plain black text documents. Add this to the fact that the black cartridge has an RRP of £6.99 and the colour just £9.99 and you can start to see just how cheap the 5300 can be to run. You can pick up a black and colour cartridge together for as little as £14.99 if you shop around. This should equate to 2p per black A4 document, 5p per A4 colour document and 7p per 4x6 photo. Suddenly, this printer starts to make sense, if it performs well it could be a winner.

Getting the EasyShare 5300 up and running was pretty easy. There was a slight hiccup, where I had just upgraded to Mac OS X 10.4.10 and the Kodak software would not install. Upon contacting Kodak support I was advised that it was not seeing the last zero in my system software, so thought I was running 10.4.1. This was a problem because the 5300 only runs on OS X 10.4.9 or later. Although this was initially a problem I must really congratulate Kodak on the prompt response to the problem. With 48 hours the driver had been fixed and I was up and running.

In use scanning was a breeze, the 5300 is TWAIN compliant, so I used PhotoShop to scan some A4 magazine pages and photos. Colours were very accurate, whites neutral and blacks where quite dense. The level of detail and density was nothing to shout about, but definitely acceptable for the home market.
Printing was also a very good experience, with nice fast black and white printing. Not anywhere near the 32ppm claim, but I did get a ten page document out in one minute. Full colour business type documents were a little slower at around 6ppm, but the colours were bright and crisp, with no spidery text. Moving onto photos and the colour reproduction was fantastic. A borderless A4 full colour photo took almost to minutes, but the colours looked very accurate, the saturation was just right and the level of detail was as good as a lab print (to my eyes). Printing from the Mac, memory card, or via a PictBridge connected camera to the 4x6 paper yielded pretty much the same results. All around 40 seconds per print and all looked very nice.

So, does the EasyShare 5300 live up to its claims? Well, in the quality department I can give it a resounding yes. Prints were crisp, had great levels of detail, and seemed very colour accurate. My only complaint was when printing A4 borderless prints, that the first one of each batch had some feint lines at the top of the print. This did not repeat itself on successive prints. The scanner is also superb, more than good enough for the home market. Copying direct from the glass to the printer was also very easy and produced good results.

In the running cost arena, the 5300 did not quite meet expectations, but I should quickly draw your attention to just how cheap it is to run. I printed out A4 black and white text filled sheets, until the black ran out and got 332 prints, which equates to 2.1p per sheet, this is fantastic and almost matches Kodak’s 2p claim. Moving onto documents with a mix of colour diagrams, a photo and black text, resulted in 178 A4 prints, which equates to 9.5p per sheet. Kodak claim 5p per sheet, but this is at 5% coverage, whereas my documents were more like 10% coverage, so again pretty impressive. Last up were a batch of full coverage 6x4 photos. Again a new set of cartridges and I loaded up the 5300 and let it run, 142 photos later and the colour cartridge was out, so this worked out at 12p per photo. Again this is very good, not quite the 7p claim, but I would be more than happy paying 12p per photo and printing them from the comfort of my house, rather than going to to a photo lab.

As a complete home printing package the Kodak EasyShare 5300 represents really good value for money. It is cheap to run and produces very good results. You also get a very good scanner and convenient copier function too. If you need to send fax documents, then take a look at the EasyShare 5500 which shares all of the features and specification in this review, but add a fax machine into the equation for an extra £70.

Product: Kodak EasyShare 5300
Price: £139.99
Supplied by: Kodak UK
Contact: 0870 2430270

Miglia TVMini Express Review

You have never previously had so much choice for recording TV to your Mac, so when something is done well, it needs to be recognised. The TVMini Express from Miglia, really is a miniature package, from the moment you receive the tiny box, you will wonder just how it will all work.

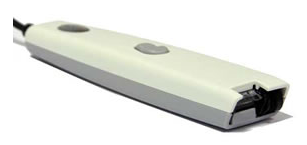
In the box you get the TVMini Express tuner. A white USB stick, not much bigger than a flash drive, but designed in white to compliment most of the Mac range. You also get a portable antenna, USB 2 cable and a CD containing a PDF user guide and the included 'The Tube' software.

Hooking the kit up is really easy, just install the software, plug in the tuner to a USB 2 port (if this is hard to get to, you can use the included cable to extend your port to an accessible location). The antenna is a different matter, and in my case I could not get a Freeview signal with the tiny portable one that is included. This will vary depending on your area. Plugging into my main roof aerial sorted the problem.

Once everything was auto-tuned in, this little device simply works, and does things very well. You can record to your hard drive, move recordings across to your iTunes library to later sync with your iPod, iPhone or AppleTV. Of course watch recordings or live TV on your Mac. It is even possible to have TheTube software float the TV viewer on top of all other applications. So you can carry on working whilst watching TV. Another nice feature is the ability to see in a single window, what is on the other channels, without having to switch over, this is a real timesaver. To round things off, the EPG is superb, it allows you to easily find programmes and schedule recordings with ease. For this bargain price, you really can bring TV to your Mac with ease.

Product: TVMini Express
Price: £34.00
Supplied by: Miglia
Contact: +44 (0)1442 827222

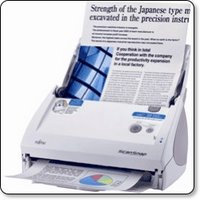
Fujitsu ScanSnap S500M Document Scanner Review

Scanning on the Mac platform has always been way ahead (or on par, some will argue) with the PC platform, except in one area - document scanning. It comes as no surprise that many manufacturers see Mac owners as designers, and when developing their scanners that handle medium to high volume scanning, they only ever release PC drivers. Document scanners can be great time and space savers. They are capable of automatically feeding invoices, brochures, and other paperwork and saving them as a file on your computer. For a long time now Fujitsu have made the ScanSnap for Mac, but it was lacking Intel support and was a little behind its PC equivalent. When they released the S500M I was very excited, even more so when BMI Solutions landed one on my desk to review.

The Fujitsu ScanSnap S500M is an all white affair, even the packaging gives that nice Apple unboxing feel. Set up is really really easy, install the Scansnap Manager software, plus the included Acrobat 7 software. The latter does not need to be installed unless you want to scan to PDF files. Of note, if you already have a later version of Acrobat installed on your Mac, then this also works a treat.

Once installed, the S500M connects to your Mac via USB. In its closed state, the feeder support that holds up to 50 sheets of A4 paper (to be scanned) folds upwards. The action of lifting the feeder also switches the scanner on. The front paper tray (for catching the scanned pages) folds down to reveal the scanner buttons. When you have finished scanning, you either fold the trays closed, to both turn the unit off and keep the dust out, or press the power button. This is a very nice design and lets the S500M take up very little desk space.

In use, things couldn't be much simpler. You fire up the Scansnap Manager and set how you want your documents scanned. You can choose if colour, black and white or auto colour detection, the latter does an excellent job, but it is of course nice to force things into black and white if you so wish. the 'scanning mode' is selected with phrases like normal, better, best and slowest. Whilst this is OK and after playing with the settings you learn what is best, it would have been more helpful to have the dpi displayed in brackets. I hope Fujitsu do this in a software upgrade. The last of the main settings is to choose simplex or duplex scanning. This is a powerful feature of the S500M, the fact that it contains an upper and lower scanning element, so it is able to scan both sides of a document in one pass.

Other options in the software allow you to choose an external application to scan to, like Adobe Acrobat (for PDF) or Preview (for JPEG). You can also set how files are names and where they are saved to. Paper size can also be set, but in my tests I found the automatic detection very accurate. As well as the scanning mode you can also set the image quality, with one slider determining the amount of compression and file size. This confuses matters even further. Don't get me wrong, the end results are fine, but if you want to make specific settings, there has to be an easier way.

All these settings is as hard as it gets. Once you have made them all it is a simple matter of load your paper into the automatic feeder and pressing the scan button.
The S500M draws the pages through very accurately and at a fast 18ppm (pages per minute), so when in duplex mode, this equates to 36 sides per minute. If you are scanning at the highest 600dpi optical resolution on a slowish Mac, then you have to allow some additional time for the computer to process the files. When a batch of 50 sheets have been scanned, you can then load more into the feeder and either start a new file or add them to the one in progress. During my tests, I scanned a mixture of computer printouts, old invoices, brochure and magazine pages. Out of 250 pages, I had just two misfeeds, and these were very thin and crumpled NCR invoices. So the S500M can fall over, but with no major effect. Any misfeeds can be re-scanned and popped back into the relevant position within the file you are creating.

Scanning to PDF is great and with the aide of Acrobat you can process your files into searchable documents. This feature makes the S500M invaluable. You can scan your whole filing cabinet of any type of document, and then search it by keyword. This makes the S500M a great timesaver, as well as freeing up all that paperwork space. I can highly recommend the Fujitsu ScanSnap S500M to you for getting your paperwork and filing organised. The price from BMI Solutions makes it even better value for money.

Product: Fujitsu ScanSnap S500M
Price: £244.39
Supplied by: BMI Solutions
Contact: 0845 838 1694
Link to product page

Wacom Bamboo Graphics Tablet Review

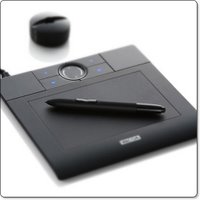
The Wacom Bamboo is a pen driven graphics tablet aimed at the consumer market, but like the professional Intuos product line, really oozes oodles of quality. Straight from the box, you can see that this compact sized tablet is well made and will be a lot more useful than just signing the odd document.

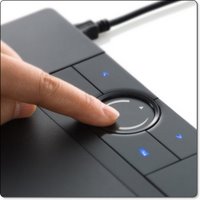
The active area of the Bamboo is just under A5 size, and above the active area are four customisable ExpressKeys, to which you can assign various functions. There is also a rather cool looking TouchRing for zooming into and scrolling around documents. The supplied pen offers 512 levels of pressure sensitivity, has a double switch rocker button and an eraser tip.

Where the Intuos tablet from Wacom is aimed at the graphic design professional, the Bamboo has been designed with the regular consumer in mind. Offering up the extra features for ease of navigation, I really wanted to see if I could get used to using the Bamboo instead of my mouse. To start off with it was tricky, the main adjustment is in the exact positioning of screen pointer. With a mouse you move your pointer around the screen, if you run out of room a quick reposition of the mouse and off you go again. With the Bamboo, the active area is mapped to directly relate to your screen real estate. You put the pen in the top left of the tablet area and that is where your pointer goes on your desktop. Of note; if you are running dual screens, you can restrict the Bamboo to the work area of just one screen or have it mapped across your dual screen area.

So navigating your desktop is very quick and precise. The ExpressKeys, which are lit up in blue when your Bamboo is connected, also help a great deal. Within the Pen Tablet system preference pane (on Mac OS X) you can assign each of the four buttons to different actions, keystrokes, modifiers, or even to launch certain applications. The top two buttons have a default assignment of Back and Forward, so this is really handy for surfing and general use. The TouchRing is also pretty neat, if you move your finger in a circular motion on it, you zoom in and out of your current application. Tapping to the top and bottom of the area scrolls you up and down. I found this really neat and it soon became a very fast way of navigating my documents.

Apart from general day-to-day use for common tasks, I wanted to try the Bamboo out in PhotoShop and Illustrator. Whilst not giving the work area of a larger Intuos tablet, the Bamboo performed really well. The pressure sensitivity allowed me to be really creative in PhotoShop and the accurate mapping allowed me to manually trace something in Illustrator. So for the occasional bit of professional work the Bamboo really does hold its own.

For under £70 you get a superb piece of kit, quite how Wacom do it for this price baffles me, you even get a two year warranty, which in my mind adds value. If you don't spend all your time in PhotoShop, but want to give those wrists a rest from constant mouse use, then give this tablet a try. The Bamboo is well made, and very user friendly indeed. I really hope my review model does not have to be sent back, otherwise the credit card will have to come out to play.

Product: Wacom Bamboo Graphics Tablet
Works with: Mac OS X, Windows 2000, XP, Vista
Price: £69.99
Supplied by: Wacom Europe
Contact: info@wacom-europe.com

Belkin Wireless G Print Server Review

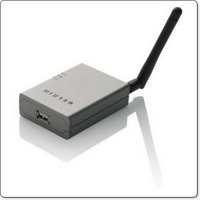
The Wireless G All-in-One Print Server at first glance looks like a very useful offering from Belkin. The ability to plug in any USB printer, even one with a scanner built-in and use it on a wireless network seems like a real boon. I just hope that this product lives up to expectations, where so many other offerings seem to fall over themselves at the first or second hurdle.

The unit itself is very compact and comes supplied with everything you need, except a USB cable (which you should have for your printer anyway). The install CD is really easy to use and allows you to set up the little unit, in my case, under 10 minutes did the job. After running the install CD, configuring the print server and wireless setting, it was connected to my wireless network. I installed my Epson R1800 printer drivers, attached it to the print server and voila, I could print to the R1800 over my wireless network.

Because you install the standard printer drivers, all the usual options you would expect to see if hard-wired are available. And, although I was testing this with a standard inkjet printer, it is claimed (and I have no doubts) to work with multi-function devices, supporting both scanning and faxing, in addition to printing.

In addition to printing wirelessly, which is absolutely fantastic, the unit also sports a memory buffer. This frees up your computer a lot quicker, as queueing is handled by the print server, rather than in your computer's memory.

So, all in all, I was impressed. For such a small price you get fast wireless printing, ease of set-up, all in a very neat package. Well done Belkin, this product certainly gets my vote.

Product: Wireless G All-in-One Print Server
Price: £59.99
Supplied by: Belkin UK
Contact: +44 (0)1933 35 2000

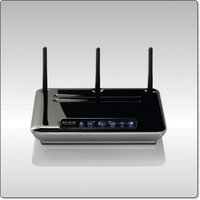
Belkin N1 Wireless Modem Router Review

We live in a wireless world, or at least we try to. Many companies want us to connect wirelessly and one company that has been ahead of the game for a long time is Belkin.

When their N1 Wireless Router was released, people sang its praises, the design was spot on, and the performance was great too. So, when the new model was released which incorporated an ADSL modem, I was on the case, could this be THE all-in-one solution we have been waiting for, enabling us to take advantage of the deluge of cheap broadband offers available at the moment.

The Belkin N1 Wireless Modem Router allows you to connect to your ADSL service via its internal modem. Setting this side of things up is really easy, you will just need to know the connection settings, which can be supplied by your service provider. These can be input manually or with the aide of the provided set-up CD, which walks you through step-by-step, though is PC only.
The N1 also offers up 802.11n draft, which can deliver up to 300Mbps data transfer rate. The 'draft' part of the deal should be taken with a pinch of salt, as all of these new 'n' devices are designed around a wireless technology that has not yet been finalised. This shouldn't worry you, because if things change, then a simple firmware update should set things right. The connectivity doesn't stop there, as around the back of the unit you have four 10/100 ethernet ports for if you need a wired connection, perhaps to a printer or a NAS drive.

The package really gives you everything required. Apart from the main unit you get an ADSL filter, quick install guide, user manual on CD, RJ11 phone cord, an ethernet cable and a power supply.

We had the N1 set up and running within about five minutes. Of important note, the unit performed superbly with our test MacBook, which we had run the Apple supplied 802.11n enabler on. You can make a change to the settings which allows the N1 to support 802.11n, b and g. The connection we achieved was strong, even where we had a 50% signal with a previous Linksys router, the N1 delivered just under the 100% mark. Throughput of data was very impressive and we streamed video and music playback without a hitch. Security is top notch too, with 64 or 128-bit WEP, plus WPA/WPA2 with a pre-shared key.

The design of the box is superb too. Instead of little meaningless LEDs, you get nice blue backlit icons showing you the units status. They show if you are connected wired or wirelessly, if your modem has a connection, and if you have security options selected. This is a very nice touch.
My only negative is the lack of gigabit ethernet, which is available in the Netgear RangeMax WNR854T (but no modem), so we can forgive the Belkin N1 on this one. Overall, this unit is very impressive, it offers everything you could want in a very polished package. Nice design, awesome performance, and a very reasonable asking price. This is definitely one for the upgrade shopping list.

Product: Belkin N1 Wireless Modem Router
Model: F5D8631uk4A
Price: £149.99 : £104.99 Amazon UK
Supplied by: Belkin UK
Contact: +44 (0)1933 35 2000

IRISCard Pro Scanner Review

Getting information into your computer quickly and easily is a problem a lot of people face. Managing information is yet another problem. With the mass of emails most people have to deal with lately, any product that promises to ease the strain is well worth a look. The IRISCard is one such product that concentrates on one type of scanning and promises productive results.

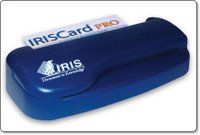
The IRISCard is available in three versions, a mini version which scans in monochrome only, and two Pro versions (one is for the Asian market) which add full colour scanning and advanced sorting options. On test here is the Pro version, which is a compact dark blue coloured unit.
The package contains the tiny scanner unit, a USB cable, quick start guide, instruction manual, and the IRISCard software. There is no power supply, as the scanner draws its power from the USB port.

When testing these products I always try to set things up without the manual, just to see how easy it is. So after installing the software, I plugged in the scanner and launched IRISCard. The screen I was presented with was pretty clean and easy to find my way around. Placing a business card in the back of the scanner sets things going. There are no buttons to press and the unit draws the card in automatically.

Scanning a card takes about ten seconds, and once scanned a thumbnail appears in the software. Highlighting any scan gives you are larger view of it in the main window. The quality of the scan is not fantastic, but at 600dpi is more than readable, but that is not what this product is about. The IRISCard scanner and software combination uses Optical Character Recognition and some clever sorting skills. The resulting information is sent direct to an application which you choose prior to scanning. A drop down menu gives you options of Text, HTML, vCard, Address Book, AppleWorks 6, Microsoft Entourage, and Now Contact…

For my tests I selected Address Book, as this is what I use as my contact manager. After making a scan and opening the Address Book application I was impressed with my first findings. I scanned six different business cards and all the information was transferred with just one error. Everything else was in the correct place, the telephone and fax numbers were correct, even really long email addresses. The only correction needed was not really the softwares fault, it was someone's name which appeared as all uppercase on the business card, so it appeared the same in Address Book.

Scanning some more awkwardly designed cards managed to throw the IRISCard software, but it seemed that anything it did not quite know where to put, it placed into the notes field. This meant that I could easily cut and paste into the correct Address Book field. You can also export cards as other formats, after they have been scanned. So I could export the cards are HTML complete with hyperlinks to my contact websites. The only problem here is that you could not export a single card by selecting it, you simply get the whole lot.

So would I buy one, or recommend an IRISCard Pro? Well, for myself, probably not, I just don't have enough business cards. The product is really good at what it does though, so if you have a lot of business cards, or perhaps you meet knew contacts every day, then this is a superb solution. It is a very handy device and just being able to slot in a business card and have the info sent to your contact manager application is brilliant. If you have this need, then you will find the IRISCard Pro invaluable.

Product: IRISCard Pro
Price: £135.00
Supplied by: I.R.I.S. s.a
Contact: +32-(0)10- 45 13 64

Netgear SPH200D - THE Best Skype Handset

The Netgear SPH200D is a cordless phone that allows you to make calls via Skype without the need to have your PC switched on. Yes, I know I have been bringing you a lot of these different solutions lately, but this offering from Netgear takes things one step further…

OK, so over the past month we have looked at a cordless Skype handset from Belkin, a handset that incorporated wireless calls with a mobile phone from Tovo, and now Netgear have the SPH200D, which is brand new to the market.
The SPH200D allows you to make those all important and often free Skype calls, but it also incorporates a DECT handset, so you can make normal landline calls via your regular provider (eg. BT).

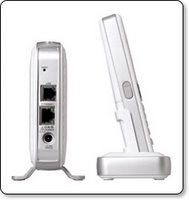
What you get in this package is pretty impressive. You get the handset itself, which is a really nice white and silver affair. It sports a full colour screen, nice backlit buttons, and a four way rocker button. There are additional buttons for intercom, mute and the built in speakerphone. Also in the box you get a receiver module, it looks like a mini ethernet hub. You plug this into a power socket, then one cable goes into your router, or ethernet network, and the other cable connects to a spare phone socket. The last nice addition to this package is a docking station. You can locate this pretty much anywhere in your house, as long as you can plug it in with the supplied power adapter. This dock is where you sit your handset when not in use, and it keeps the juice topped up too.

When the handset first powers up, all you have to do is sign into your Skype account. You then have access to all your contacts, call history, and you can set your status, in exactly the same way as you do on your computer based Skype application. You can also change the ring tones, display brightness and contrast, in pretty much the same way as you would a mobile phone. If you are calling a Skype contact, then the call is free, completely free. Or you can call a regular phone through your Skype account. This is called a SkypeOut call and depending on what subscription or promotion you are on, there may be a small charge.

Now for what makes the SPH200D really useful…>>> the DECT (Digital Enhanced Cordless Communications) capability. Most households have cordless DECT phones nowadays. The SPH200D has this too and it makes this a really invaluable package. When you dial in a number or choose to call a regular landline or mobile phone from your contacts, you are given an option. You simply select to either make a SkypeOut call or a Landline call. This is brilliant, because now you have the best of both worlds. You can use Skype when it is cheapest for you to do so, and make regular calls when Skype is not the best option.

Before I tell you that you MUST buy this product, just a little snippet about Skype. I am currently on a promotion where I get totally free national calls in the UK for the next six months. If you are not on this promotion then regular Skype works like this.
If you are calling a Skype user, for example someone who has Skype on their Mac or PC, then the call is free. However, if you are calling a mobile, landline or an international number, then you will be charged. You basically have to keep your Skype credit topped up. The rates are very good though, especially on international calls.
There is also a new service called Skype Pro. An initial 5 month subscription will cost £9.20 which includes approximately £3.40 of calling credit, after the 5 months introductory period is over £1.50 per month is deducted from your Skype credit.
The Pro benefits are that you only pay a 3p connection fee per call to UK landlines, with nothing extra for the minutes you use. You also get free voicemail, plus a discount on a SkypeIn number. The regular Skype-to-Skype computer based calls remain free.

OK, so enough on Skype, back to the Netgear SPH200D. This is the best combination product I have seen so far and it has got me really excited. Since I have had it to review it has worked flawlessly and has not failed me once. The design is awesome, with a crisp glossy white finish. You can even expand the system with up to three additional SPH150D handsets (£65-£70), so you can have Skype and DECT in every room. The average street price is around £105 though I have seen it dip under the £100 mark if you shop around. This pricing is very good and buys you a top class product that is not only a real pleasure to use, but will also save you a lot of money.

Product: Netgear SPH200D
UK Street Price: £105 (UK average)
Supplied by: Netgear, Inc.
Contact: +44 (0)1344 458200
Link to product datasheet.

Samsung 215TW LCD Monitor - Spot on!

The Samsung 215TW is one of the few products I was actually happy to purchase for Geekanoids, without seeing it first. I had heard so many good things about it that I was just hoping that the rare occasion when my wallet comes out, was justified.

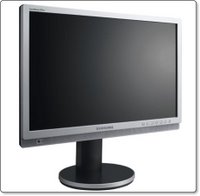
Samsung offer a lot of monitors in their range, and there are so many choices from other manufacturers. Apart from the reviews, the 215TW boasts an impressive specification. Of note, the 21-inch 1680x1050 panel offers 1000:1 contrast, is nice and bright at 300cd/m2, and has a nice 178 degree viewing angles. The panel is also true 24-Bit, so there is no trickery like found in some cheaper panels to achieve the 16.7 million colour display. Although I didn't buy this to play games, the 8ms response rate makes it ideal for gaming and video playback too. On the rare occasion I have played a game, there was no ghosting or noticeable lag.

Connections are very impressive, with DVI and VGA inputs I can have two computers connected at the same time. You are also treated to composite, s-video and component video inputs. Just for the fun of it I tried a DVD player through the composite video connections, and I was really impressed. Colours were punchy and the crispness and detail would be hard to beat.

My main use for the 215TW is graphic work, encompassing Photoshop, Quark Xpress, Freehand (yes, I still use Freehand) and a lot of web based work. The colour accuracy is very impressive and the display backlight is so uniform, it really is hard to find fault. Well, the only thing negative I can say is that the 215TW is so difficult to move. It has a very nice slide mechanism for adjusting the height of the display, which makes it difficult to lift. Thank goodness that you don't have to move these things very often.

There are a lot of cheaper monitors out there, some even adding an extra inch whilst still be cheaper. Be warned though, these cheaper monitors use different display technology. They would be OK for gaming, but if you are serious about graphic orientated work, then it is worth spending that little bit extra. There is no better test than seeing a monitor with your own eyes, but if you are not able to do this and you rely on mail order, then give a Samsung 215TW a go... I am certain you will not regret it.

Product: Samsung 215TW
Price: £360
Purchased from: Pixmania UK
Contact: 08700 118 117

Lindy HD Enclosure - Save yourself some cash

If you need to add extra storage to your computer an external hard drive is the easy and relatively cheap option, with large hard drives available at really good prices. However, if you already have an old IDE hard drive, it would be a shame to waste it, when it could be put to good use. Also, bare IDE hard drives are so cheap nowadays that the product I am looking at today could be right up your street.

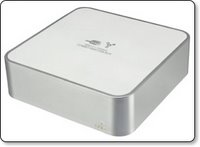
The Lindy USB2 & FireWire Combo Hard Disk Box is an enclosure that is styled to match the Apple Mac Mini. It is made of plastic, that is sprayed silver, with an internal metal shielding that is coated with white plastic on the top. It really does look like a Mac Mini and would be ideal for stacking. The front of the casing sports a small activity LED and round the back there is two FireWire 400 ports and a USB 2.0 port, as well as the on/off switch and power connector.

Inside there is a standard molex power connector and an IDE cable and plug. The plastic mounting sled can accommodate a 3.5-inch IDE hard drive, which can be picked up for bargain prices if you shop around. Mounting screws are provided and within about five minutes I had a drive installed, the enclosure casing back together and was plugged in to my Mac. Performance is certainly on par with a other external hard drive of this nature and I personally think that the plastic construction helps dampen the hard drive noise, so it is nice and quiet. Their is no fan in the enclosure, so cooling is purely achieved via the vents on the back and underside.

Although this case is obviously designed for Mac Mini users, due to the standard FireWire and USB connectivity, it can be used with any PC or Mac. It looks nice and swish, so it wouldn't look out of place on any desk. The Lindy USB2 & FireWire Combo Hard Disk Box is well constructed, easy to set-up and offers great value for money. It'll give you a sense of achievement if you re-use an old hard drive. Even you if buy one just to put in this enclosure, you will be happy that you saved some pennies.

Product: Lindy USB2 & FireWire Combo Hard Disk Box
Price: £39.99
Supplied by: Lindy UK
Contact: +44 (0) 1642 754000

Belkin Wi-Fi Phone for Skype review

Today I am taking a look at the Belkin Wi-Fi phone for Skype... Skype, Skype, Skype, I always sing the praises of Skype. For those of you who do not know, Skype allows you to use your broadband connection to make voice and video calls to other users Macs or PCs, so long as they have Skype installed. In addition to this, you can also make what are called SkypeOut calls to regular landlines and mobile phones. These cost a small amount of money, but in my case I am on one of the many promotions Skype run from time to time, so I get my landline calls free until May 2007.

The only downside of Skype is being tied to a computer. You need to have your Skype application running and logged in... that is until now! Over the past few months Skype handsets have been appearing. No, I don't mean the wired handsets that cost around £15, this new breed use Wi-Fi to connect to your wireless router and then to the outside world.

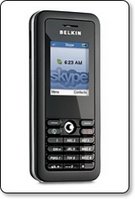
Sorry for the long introduction, back to the Belkin Wi-Fi phone. In the box you get a USB cable (for charging from a computer), a mains powered charger, a manual on CD-Rom, a Quick Start Guide and the handset itself. The handset looks very smooth, comparable in to a medium sized mobile phone. It has a numeric keypad, two soft keys, call start and end, plus a four-way navigation key. The screen is full colour and a nice size, with a nice crisp display. The feel of the handset is great, it has a smooth rubberised feel to it, very nice in the hand.

Setting up couldn't be easier. After the initial charge, you switch the handset on, set the language, and it then searches for wireless networks. Picking the network you want to connect to will ask for a password (if it is protected). This is asked for as a hexdecimal string, so if you network is protected by WEP for example, do a quick google search for a converter to convert from WEP to HEX. With the security part out of the way you will be asked to either sign into Skype or create a new account. Assuming you already have Skype, typing in your username and password is all that is needed. You can then access you contacts list, set your status to online, away, busy etc, and make calls to other users computers or SkypeOut calls to landlines and mobiles. Navigating the menus and setting up other aspects of the handset is just as easy. You can even change your ring tone (three to choose from) and set the handset to vibrate on an incoming call…

The beauty of the Belkin Wi-Fi phone is that now you can leave it connected to Skype all the time. You will get a lot more use out of it because it is just so natural to pick up a phone and dial. Of note, if you switch your computer on and sign in to Skype, your Belkin connection remains unaffected, so in theory two people could use one Skype account at the same time.

Call quality varied, but this happens even when calls are made via a computer. I would say that 80% of calls I made with the handset were absolutely fine, crystal clear. 10% were acceptable, perhaps sounding more like mobile phone quality. The remaining 10% were a bit choppy, due to network traffic or moving a bit too far away from my wireless router. So, in the house, this handset was already proving its worth, but what about if I was out and about? Well, if you have an account with The Cloud, BT Openzone or another provider, then so long as you are within range of a hotspot, you can connect and make calls. I tested this at a local Cloud hotspot and connected successfully first time. The call quality was great and I was so pleased that I had made a totally free call.

Incoming calls are also possible. If someone has you in their Skype contact list, then they can easily call you from their computer. If you want people to be able to ring you from a regular handset then you would need to subscribe to another service. You can get a SkypeIn number, which can be based in various UK towns and cities (what I mean by this is, that even if you don't live in London, you can have a London based SkypeIn number). This costs around £23 per year, but can be had cheaper if combined with other services. A SkypeIn number also gets you access to voicemail services, so callers can leave you messages. The fact that people can call you, makes the Belkin handset an even more viable proposition.

Should you buy one? is very easy to answer. If you already have Skype, then yes, invest in one of these. If you don't have Skype, then get it and start experiencing the world of free or cheaper calls. I do not think that the Belkin Wi-Fi phone for Skype could replace a mobile phone, but if you are up for the challenge or live in an area with a lot of hotspots you could easily reduce your mobile bill. The only thing I would like to see is a docking station to charge the handset whilst indoors, other than that the Belkin handset is faultless.

Product: Belkin Wi-Fi Phone for Skype
Price: £99.00
Supplied by: Belkin UK
Contact: +44 (0)1933 35 2000

Razer Pro Click V1.6 Mouse Review

The Razer Pro Click V1.6 Mouse from Razer USA grabbed my attention last week, and they kindly sent me one to take a look at. What drew my attention to this rodent was the fact that it was not trying to be some clever cordless or bluetooth mouse. Instead it was just claiming to be a high quality precision mouse, with a seven foot cord!

I am from a design background and believe me, when I say I have tried lots of mice, I mean LOTS of mice. What I always look for initially is comfort in the hand and smooth tracking. The Pro V1.6 certainly fits very nicely into my hand (which is what I would term as medium sized). The mouse is of a flat design, but just curved enough to fit into the cup of your palm. Onto the tracking, and straight out of the box it feels really responsive. The weight is a little on the light side, but after an initial get-used-to period it feels a lot better. No drivers had been installed at this stage, so to be impressed already was a pretty good start.

The Pro V1.6 comes with a driver CD and although it is not necessary to install it, there are many advantages in doing so. The drivers support Mac OS X 10.3 or later and Windows XP, 2000, Me and 98. Concentrating on the Mac side of things, the driver was a breeze to install. Once installed system preferences allows you to assign different functions to the seven buttons and to choose between right or left handed use. The scroll wheel speed can also be changed, but where this mouse excels is in its precision and sensitivity when moving your pointer round the screen…

In the 'Sensitivity' tab of the preferences, apart from the double-click speed, you can also adjust how sensitive the mouse is to your movements. This ranges from 1-10 and really does make a difference to how the mouse behaves. You can also assign a button to 'On-the-fly Sensitivity' which allows you to hold this button in and adjust the sensitivity up or down with the scroll wheel, without having to go into your system preferences. There is also an advanced tab which allows even more control. You can set independent sensitivity for the X and Y axis of the mouse, set pointer acceleration and also switch between 400dpi and the full 1600dpi resolution.

All of these extra settings really do make the Pro V1.6 invaluable to designers, illustrators and graphic artists. Using this mouse in PhotoShop was a revelation, the amount of control and precision made image editing so much easier. If you are serious about your design work, then ditch the cordless mouse and get a proper mouse. The Razer Pro Click V1.6 Mouse is highly recommended.

Product: Razer Pro Click V1.6 Mouse
Price: £30 (average UK)
Supplied by: Razer USA Ltd
Contact: saleseu@razerzone.com

IRISPen Executive Review

Things that save me time are always high on my list of priorities, and when presented with a device that can turn typed documents into useful pieces of text I was up for taking a good look. The product is the IRISPen Executive, which is a small handheld pen type scanner, with a small scanning head that captures three or four lines of text at a time.

From the offset, the IRISPen may not sound that impressive, but it the usefulness of this little device that wins me over. More often than not I find myself reading something in a magazine and wanting to quote it in an article I am writing, or perhaps email it to a friend or colleague. Under normal circumstances I would have to type it, or scan it and send as an image. With IRISPen I can slide the scanning head over the text and, voila ! the text is transferred into MS Word or my email application (for example). This alone saves me so much time.

The pen itself is very light and compact. It connects to your PC or Mac via a USB connection and after a quick install of the included software you are good to go. The printed Quick Start Guide talks you through the simple installation, followed by calibrating the pen scanner. There is also a proper printed and fully illustrated manual, which is great, as so many products nowadays rely on PDF manuals, so this is a nice inclusion.

The pen has two buttons on it that can be assigned to various functions, plus the tip is pressure sensitive, so when you push it onto a page and scroll to start scanning, it senses this automatically.
Scanning is simplicity in itself, you position your cursor on-screen where you want the scanned text to appear, then start scanning. The text is pulled straight into the application. It is pretty quick and can handle scanning 3.15-inches per second. Accuracy is excellent, the software claims to recognize up to 1,000 characters per second. I had no way of measuring this, but testing scans from various magazines and books I completed twenty scans. During this test I had only three incorrect words, which were easily corrected.

The software has some great features on top of the simple scanning. Things like the ability to read and retype barcodes, recognition of hand written numbers, and even setting pre-defined characters to be automatically erased or replaced in a document.

Now, I am going to be honest here and let you know my initial impressions before I knew the IRISPen was on its way to me. I thought long and hard about how and why I would recommend such a device. It is not cordless and seemed just to simple to have any real use. Well, what a revelation, the only way I can describe the major selling point of the IRISPen is as follows.
If you want a small, lightweight scanner, that will save you hours and hours of retyping material that is already printed, buy one. If you often need to quote things you have read, buy one. If you need a flexible, timesaving device, that will not break the bank, buy one. Enough said !

Product: IRISPen Executive
Price: £115
Supplied by: I.R.I.S. s.a
Contact: info@irislink.com

Konica Minolta Magicolor 2550 Review

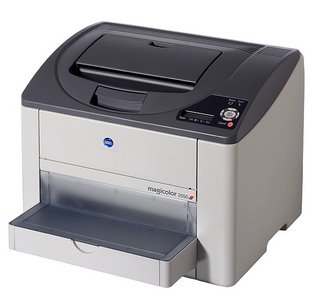
The Magicolor 2550 is positioned as one of Konica Minolta's entry level colour laser printers, well almost entry level, as it offers some very nice features without taking the price of the device too high.

The specification on offer from this full colour model is a cracking 20ppm (pages per minute) in monochrome and 5ppm in full colour. The native resolution is 600dpi with a x4 dithering method which beefs this up to an effective 2,400dpi. The model on review here is the standard model, which has 128MB of memory, is network ready and offers Postscript 3 printer language in addition to PCL6 and PDF support.
The 2550DN which is the next model up adds a built-in duplexer and has 256MB of memory, it also adds Pictbridge support for direct connection of a compatible digital camera. Both models are capable of handling a monthly duty cycle of 35,000 pages per month and are supplied with a 1-year onsite warranty.

OK, now the formalities are out of the way, on with the review, and because this laser printer is accessible to most users price reach I will attempt to keep things non-technical. The unit itself is very compact, almost a 40cm cube, with a nicely positioned LCD control panel on the bottom right corner on top of the printer. Setting up is very very straightforward, simply installing the toner cartridges, then installing the software, plugging in either a USB2 or ethernet cable (or parallel, ahem) and you are good to go.

What surprised me when turning the unit on was how quietly it runs. The initial startup has a few whirrs, which is to be expected, but once in standby you will hardly hear it (<35dBA) and even when running the quoted <52dBA is way over what I think I am hearing. This is one quiet printer, so really suitable for home/office use.
To test the 2550 I printed a variety of pages to it, the first of which was a plain black and white text document, which was processed very quickly. The first page printed in approximately 12 seconds and a full 19 pages printed in one minute, just slightly under the quoted speed. Text was clear and readable right down to 3 points, though I would guess the smaller text was also readable, just not by my eyes.
Next up was a full colour PDF document, with a mix of text and 3 photographs. First page out in 24 seconds, and a total of 5 pages were printed in the full minute. Quality of the full colour text was crisp and very readable, the photographs also showed nice smooth colour transitions and a nice amount of detail, even in the darker areas. The 2550 will accept up to 200gsm paper, which is a thin card, so I decided to test the printer with a different type of paper. I used a 160gsm Mondi Colour laser paper, which has a slight coating or sheen to it and is very high white in appearance. The results on text were not really much different, maybe only standing out on the page a little more. The photographic images were really superb, they just came alive with so much more vibrancy. This combination of paper with the 2550 really impressed me and I highly recommend that you experiment with different paper types, should you choose to buy this printer.

Running costs are very good, with the black toner cartridge (£46) delivering 4,500 pages (at 5% coverage) and the colour cartridges available in either standard (£48) (1,500 pages) or high capacity (£76) (4,500 pages). These prices were attained by a quick bit of Google searching, which also turned up a high capacity value kit, containing all four toners for £220. You should expect to be paying around 6p per colour page and about 1p per black and white page, not bad at all. So, I was impressed by the specification of the Magicolor 2550, and even more impressed by the quietness of the printer. What I did not expect was such stunning image results from a printer that costs just £399*.

Throughout testing I did not experience any paper jams, connectivity, or speed issues. I also liked the fact that I could print almost to the edge of the sheet, with just 4mm margins. Add to this, the fact that as my needs become greater I could also choose to expand the paper handling capacity from the standard 200 sheets, to an additional 500 sheets with the optional lower paper tray and you are onto a real winner. There are a lot of choices when it comes to colour laser printers, but if you want a model that is a definite step-up from those entry level offerings, the Magicolor 2550 should definitely be on your short list.

*Pricing on the Magicolor 2550 is very good, at just £399. Konica Minolta currently have an offer on at the moment, where you can mail-in to claim £100 cashback, making the effective price just £299. Plus the offer includes an extended 3 year warranty. At the full price I would recommend the 2550, but with these extra incentives it really is a no-brainer.

Link to product: Magicolor 2550
Supplied by: Konica Minolta UK
Price: £399 (minus discounts)
Contact: info@bpe.konicaminolta.co.uk

Epson Perfection V100 Photo Scanner Review

It brings me great pleasure to share with you the review of the Epson Perfection V100 Photo Scanner that I wrote over at MacNN.

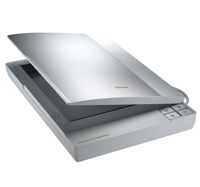
"The V100 is a nice slim line off-white unit, with silver plastic on the lid. It sports four brushed metal quick buttons on the front that provide access to the Epson scan software, or to scan directly to print, email or a PDF file. A hinge opens the lid along the long edge, which is a little different from other scanners."

Head on over here to read the full review, enjoy !

Link to V100 product page at Epson UK.

Epson Stylus Photo RX560 Review

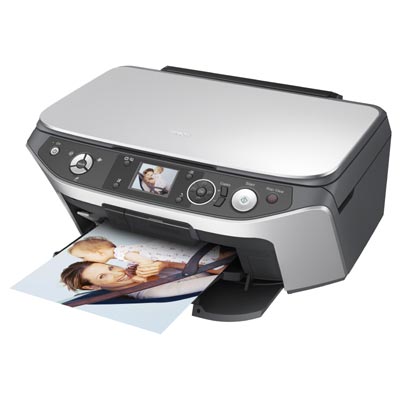
Whenever I read about inkjet printers, more often than not, it is complaints about how expensive the ink cartridges are and that we live in a rip-off society. Over the years, I have come to learn (as some of you may have also experienced), that some manufacturers do in fact charge extortionate amounts for refills. Epson do not fit into this category, they have always touted how individual ink cartridges save you money and followed through with very good pricing. The Epson RX560 fits right into this category, using six individual ink cartridges, which can be replaced for as little as £6.99 each, so running costs for this all-in-one unit are going to be very good.

Now, I may as well admit it, but having reviewed many printers before, this is my first time to take a look at an all-in-one solution. The RX560 offers a six-colour inkjet printer, that fits into Epson’s ‘Stylus Photo’ range, it also has a flat bed scanner, so you can scan either in Epson’s software or in any twain compliant application, such as Photoshop, but wait, there’s more, you can also place something on the scanner glass and copy it, without even switching your computer on.
All this, plus there is also a memory card reader on the front of the unit, along with a 2.5 inch LCD screen for viewing settings and the photos stored on your memory card. So again, you can print out great looking photos without the use of a computer. There is also Pictbridge support, so you can connect you digital camera direct to the printer.
To top things off, the RX560 is also capable of printing directly onto CD’s and DVD’s that have a white printable surface. I have used an Epson R300 before and printing direct onto a disk is very handy. The RX560 delivers the sort of quality you would expect, with the only change here being the mechanism for sliding in the CD tray. Tucked away inside the paper output tray is a small blue lever, pop this down and the paper tray then adjusts to allow you to insert your disk in the supplied holder... it really is that simple.

So, the RX560 seems to offer a lot of features, but how good does it perform? I am hoping that it delivers the goods we have all come to expect from Epson, read on to find out…

First up, we will take a look at the printing quality. New inks in the form of Claria ink technology promise superior quality and up to 200 years durability when stored correctly. This sounds fantastic and is a great advance for keeping prints looking good for a very long time. The actual depth and vibrancy of the prints are astounding, the 5760x1440dpi resolution (when used) delivers so much detail that you will not be able to distinguish the Epson prints from lab photos.

The scanner offers an A4 size flatbed, an optical scanning resolution of 1200x2400dpi, with software supplied that is fully twain compatible, allowing you to use the scanner directly from within Photoshop. The resulting scans, as with the printouts are very details, have good depth and more importantly when scanning, they are very true to the original, with colour accuracy being very good. In use the scanner is a little noisier than a standalone flatbed, this is probably due to the noise of the scanhead being amplified by the cavernous printer underneath it. Don’t take this comment too seriously, as it is not obtrusive at all.

The menu system is superb, a nice bright 2.5 inch LCD screen which changes according to the mode you are in. A three-way mode button allows you to choose between ‘Copy’, ‘Memory Card’ and ‘Speciality Print’. When you have selected your mode, to the right of the screen you have four way arrow control buttons, with an OK button in the centre, plus a button at each corner of the screen. The main arrow control buttons allow easy navigation around the menu system and everything is laid out logically. With so many options and settings to choose from an intuitive menu is essential and Epson have done everything right.

Memory card support is good too, with compact flash, secure digital, memory stick and xd picture card slots hidden behind a smoked plastic panel. Navigating through the pictures is really easy and you can select individual pictures to print, all pictures, or go through selecting a different quantity of each one to print. You can even scan off the flatbed straight onto a memory card. The RX560 also acts as a memory card reader, so you can transfer your photos onto you Mac or PC from the printer. This is great as it means if you were previously using a memory card reader you regain one of your used USB ports. The printout of photos (I was using 7x5 glossy paper) is both quick and delivers stunning quality yet again.

The Epson RX560 offers so much to the end user and at a very reasonable cost. Think about it, if you were to go and buy a good quality inkjet printer, you are looking in the £100 range at least, add a scanner into the equation and to get a scanner of equal quality you need to splash out another £100, then add in a memory card reader at say £15, a colour inkjet copier at £100 and you can soon see where I am going with this. For under £150 you can have it all, great printouts, excellent scanning, all that extra convenience, wrapped up in a nicely designed, well laid out unit. The RX560 should be top of your list if you are looking for an all-in-one device. Now I just have to beg Epson to let me keep this one, I can feel the withdrawal symptoms already.

To download a printable PDF version of this review click here.

Product supplied by Epson UK
Retail price: £149.00
Contact: 08702 416900
Link to product.

The Amazing Astounding Danger Mouse

I often ask myself, just how many items can someone review and still give a fresh and interesting evaluation that readers will be interested to read. This was more difficult to answer than I first thought, but I came to two conclusions. Firstly, it helps if the product is useful and well thought out and secondly, it pays dividends to actually use the product.

The Danger Mouse from MacMice fits nicely into both of my realisations and I am sitting here right now writing this review whilst actually using the product. I feel instantly at home with it for many reasons and all of these reasons fit into the ‘well thought out’ category.

Let me explain exactly what I mean and to kick off, you have no batteries to worry about. People rave about not being tied to their desk with wires, but let’s be honest, we are tied to our desks most of the time working, so what real problem does a tiny little wire cause... STOP right there, I said it, ‘tiny little wire’. The Danger Mouse chalks yet another win here with a nice lengthy and flexible wire, without actually measuring it, about 4 feet long and plenty to tuck down the side of the desk, or to get things looking neat and tidy without effecting movement of the rodent. Performance is great too, using laser technology with no lens makes the tracking ultra-smooth and very precise. For those of you who would like me to quote the numbers, it has a massive 1600cpi resolution, which for everyday work is really of no benefit, but start using apps where precision is critical and you will be very surprised at how good this mouse is.

Two buttons and a scroll wheel are pretty much a minimum nowadays and this is exactly what the Danger Mouse gives you. The two buttons make up the split top casing design and have a very positive ‘definite click’ feel, with not too much travel. The scroll wheel is a non-click design, so scrolling is very smooth and silent, it also acts as a third button when you press it down and it performs impeccably.

So if you are not fussed with having dozens of buttons at your fingertips, but would rather have a good quality, well built, wired mouse, then look no further. The Danger Mouse echoes the styling of Apple’s mice, in a nice gloss white finish and light grey cabling. It is also available in black, for those of you who own a black MacBook, you can now have a matching mouse! What makes this rodent stand out above the rest is its’ very smooth tracking, high resolution, nice buttons and above all else, at last we have a wired mouse with a decent length cable! Thank you MacMice, thank you !!!

To download a printabel PDF version of the review click here.

Product supplied by MacMice
Contact: 408-979-9979
Average street price: $29.99
Link to product.

Lacie mobiledrive - big storage, mini size!

Many people nowadays are turning to laptops for their main systems, not only due to the power that is now available in these mobile machines, but also because it offers a very versatile set-up. Not having to look after two systems is very nice and the ability to connect your laptop up to an external display, gives you the best of both worlds.

Storage whilst on the move is very handy, but when your laptop comes with maybe only 60Gb of internal storage, the only option is to either get a larger hard drive fitted, which is often expensive, or invest in an external device. This is where the Lacie MobileDrive comes into play, because it offers you 80Gb or 100Gb (as reviewed here) of external storage in a very neat package. This unit is very nicely styled, sleek curves to the front and no protruding feet to catch on things. It is small enough to easily fit into a large coat pocket or a normal bag pocket alongside your laptop. It does not feel cheap either, despite its’ very competitive price tag.

Their is one green power/activity light on the top of the hard drive casing and the back sports a single USB2 connection and a port for the (optional) power supply. A very important note here, is that the MobileDrive worked perfectly with both a MacBook and older 12-inch PowerBook G4, happily drawing power from a single USB2 port, so no need to carry around a bulky power supply. If you do need more power, then the supplied powershare cable allows you to draw power from a second USB port. This is in contrast to a previous encounter I had with a SmartDisk Firelite drive that needed an external power supply to jump into action.

All the cables, a quick start guide and a utility CD is supplied in the box, with straight plug’n’play use for most systems (Windows 98SE & ME require drivers). In use the drive performed very well indeed, with a 270Mb file copying across in 16 seconds and a 1Gb file in just 68 seconds. All this with silent operation with no noticeable vibrations coming from the unit. There are a lot of mobile hard drives available on the market nowadays, but the Lacie MobileDrive wins my vote for styling, it’s silent operations and the user friendly smooth sleek lines to the casing. Not forgetting the all important performance which is the icing on the cake.

To download a printabel PDF version of the review click here.

Product supplied by Lacie UK
Contact: sales.uk@lacie.com
Retail price: £99.00
Link to product.
Link to product datasheet.

Netgear DG834N Review

We all want extra speed, it doesn’t matter how fast a human can actually read a web page or surf the ever expanding internet, when we see the new offering of ‘Super-uber 500 Megabit Broadband’ we sign up before even looking at the price. We want to download that movie (legal download of course) and boast to our friends how it download in just ten seconds. For the rest of us, who want to be productive in our daily work, of course speed is important, but so is stability of service and, if you use a laptop, wireless speed is also right up there on the top of the list.

Often referred to as 802.11x where ‘x’ can be an a, b or g, the differing speeds are not often noticeable, but a new offering has been around for a little while now, in the format of ‘draft 802.11n’ and we take a look at Netgear’s DG834N which offers this, plus a whole lot more. Before I continue I should make a clarification about the ‘draft’ statement. This is because 802.11n is not a standard yet, the final specification has yet to be carved into stone, so things may change. Some say some devices may become redundant if things in the final 802.11n change too much, but I say in this day and age, any changes made would most definitely be available as a firmware update.

So, the DG834N falls into Netgear’s ‘RangeMax Next’ range and is offered alongside various other devices that compliment the new speed offering. These include a wireless notebook adapter (WN511B) and a wireless PC adapter (WN311B) which we have here to test as well. It is only really when you use these in conjunction with the DG834N that you will benefit from all the new improvements on offer.
However, you can use this device with your current set-up as it does offer compatibility with 802.11b & g.

Speed Demon
So the new speed increases promise up to 270Mbps when used with the relevant adapter, compared to 11Mbps on 802.11b and 54Mbps on 802.11g, so a very worthwhile jump. In practice and without getting to technical, I found downloads over wireless to offer on average a twofold improvement, dependent on the position of my PC (with WN311B adapter installed). A handy table below shows all the different protocols and what speeds they have to offer... to download the full review click here.

Product supplied by Netgear, Inc.
Contact: +44 (0)1344 458200
Average street price: £93.88
Link to product.
Link to product datasheet.